标签归档:Laravel

Laravel查询在死锁发生时返回空集合

想象一下,您有两个进程同时执行以下PHP代码,将显示什么结果?

\DB::transaction(function (){
   dump(User::where('id',1)->lockForUpdate()->first());
});

令人惊讶的是,一个进程打印正常的查询结果,而另一个进程打印一个空集合(数组)。 返回空集合的代码并未按照我们想的那样触发死锁异常!然而,如果您查阅了transaction方法的源代码,则会发现在发现死锁之后,该方法会自动重试事务。 而且当死锁的数量达到设定值时,最终死锁将被作为异常抛出。 但是,当前这个实际发生死锁的查询看起来却很正常,因为它返回了一个空集合!

这个意外返回的空数组和未抛出的死锁异常实际上是一个古老且棘手的PHP-PDO bug。 在7.4.13发布之前,它已经广泛存在于许多PHP版本中。 有许多与此相关的讨论,例如:

  1. https://bugs.php.net/bug.php?id=76742
  2. https://github.com/php/php-src/pull/5937
  3. https://github.com/php/php-src/pull/6203
  4. https://github.com/php/php-src/commit/b03776adb5bbb9b54731a44377632fcc94a59d2f

在PHP7.4.13之前,你几乎没有办法直接检测到此错误。 切勿尝试打开PDO :: ATTR_EMULATE_PREPARES来解决此问题! 因为此选项将使您所有的PDO查询结果都变成字符串,数据类型的丢失将会导致更严重的后果。

因此,唯一可行的方法是手动编译已修复的PHP源代码,或安装新的预编译版本的PHP7.4.13。

Laravel Union操作后排序错误的问题 Fix the wrong order after using union method in Laravel query

解决方法,在两个子查询中分别加上limit即可。可以使用较大的数确保所有记录返回。

The solution is to use the limit method on the two subqueries. You can use a larger number to ensure that all records are returned.

$orders1 = Order::where('id', '=', $user->id)
    ->where('status', '!=', 0)
    ->orderBy('id', 'asc')
    ->limit(1e8);

$orders2 = Order::where('id', '=', $user->id)
    ->where('status', '=', 0)
    ->orderBy('created_at', 'desc')
    ->limit(1e8)
    ->unionAll($orders1)
    ->get();


Laravel 5.5在浏览器中预览Notification渲染 Previewing Laravel Notification In Browser

对于Mail,我们可以通过下面的代码在浏览器中预览Mailables

For Mail, we can preview Mailables in the browser with the following code.

Route::get('/mailable', function () {
    $invoice = App\Invoice::find(1);
    return new App\Mail\InvoicePaid($invoice);
});

然而Notification类中toMail返回的MailMessage实例,Laravel文档中并没有给出直接方法在浏览器中预览,我们可以采取下面的方法。

However, the MailMessage instance returned by toMail method in the Notification class does not give a direct method to preview in the browser in the Laravel document. We can use the following code.

Route::get('/mailable', function () {
    $message = (new \App\Notifications\FooNotification()->toMail("bar");
    return app()->make(\Illuminate\Mail\Markdown::class)->render($message->markdown, $message->data());
});

在Laravel5.8及以上,MailMessage实现了Renderable接口(PR in Github),所以可以直接return MailMessage实例作为响应了。

In Laravel 5.8 and above, MailMessage implements the Renderable interface (PR in Github), so you can directly return the MailMessage instance as a response.


在mac上使用vmbox映射本地目录开发laravel时,解决storage目录Permission denied的问题

我目前使用vmbox中的ubuntu虚拟机共享代码目录来开发laravel,在这期间遇到一个古怪的问题,就是发现storage目录下面的一些文件虚拟机里的php-fpm貌似没有权限(Permission denied),包括但不限于storage/app,storage/logs等。

而当我在mac中把这些目录的权限改为777后发现并不能解决问题。其中在storage/framework/cache中,php-fpm的确拥有了在这个目录创建二级目录的权限,但是貌似在他自己创建的目录中,php-fpm又并没有w权限了。

后来登录到ubuntu中测试发现,php-fpm在cache文件夹创建了缓存索引文件夹,所有者居然是root的,而且的确没有其他人的w权限。后来又经过其他测试我发现,在vmbox的共享目录中,无论你在虚拟机里使用哪个用户创建什么文件,它的所有者都是root:root,权限也都如下图所示。

后来这个问题用了很多方法,包括mac这边设置用户组,ubuntu设置用户组,但都没有很好的解决。后来想了一个终极办法,就是让php-fpm以root的权限运行。解决方案参考:https://onlyke.com/html/883.html

Laravel 5.3 让用户使用明文密码并登陆

虽然不推荐使用明文密码,但是我还是发一篇教程

使用的方法还是自定义Hash,只不过我们在处理中不进行hash运算即可,参考https://onlyke.com/html/829.html

首先,新建自定义的NonHasher

<?php
namespace App\Libraries\Hashing;
use Illuminate\Contracts\Hashing\Hasher as HasherContract;
 
class NonHasher implements HasherContract{
 
    /**
     * Hash the given value.
     *
     * @param  string  $value
     * @param  array   $options
     * @return string
     */
    public function make($value, array $options = []){
        return $value;
    }
 
    /**
     * Check the given plain value against a hash.
     *
     * @param  string  $value
     * @param  string  $hashedValue
     * @param  array   $options
     * @return bool
     */
    public function check($value, $hashedValue, array $options = []){
        if (strlen($hashedValue) === 0) {
            return false;
        }
        return strcmp($value,$hashedValue) == 0;
    }
 
    /**
     * Check if the given hash has been hashed using the given options.
     *
     * @param  string  $hashedValue
     * @param  array   $options
     * @return bool
     */
    public function needsRehash($hashedValue, array $options = []){
        if (strlen($hashedValue) === 0) {
            return false;
        }
        return $hashedValue;
    }
}

然后,在AuthServiceProvider中注入

#app\Providers\AuthServiceProvider.php

namespace App\Providers;

use Auth;
use Illuminate\Auth\EloquentUserProvider;
use App\Libraries\Hashing\NonHasher;
use Illuminate\Support\Facades\Gate;
use Illuminate\Foundation\Support\Providers\AuthServiceProvider as ServiceProvider;

class AuthServiceProvider extends ServiceProvider
{
    /**
     * The policy mappings for the application.
     *
     * @var array
     */
    protected $policies = [
        'App\Model' => 'App\Policies\ModelPolicy',
    ];

    /**
     * Register any authentication / authorization services.
     *
     * @return void
     */
    public function boot()
    {
        $this->registerPolicies();

        //使用自定义的Hash来处理密码
        Auth::provider('non', function($app, array $config) {
            return new EloquentUserProvider(new NonHasher,$config['model']);
        });
    }
}

当然,最后别忘了设置config\auth.php下面的providers中driver为你上面在Auth::provider中声明的名字

/*
    |--------------------------------------------------------------------------
    | User Providers
    |--------------------------------------------------------------------------
    |
    | All authentication drivers have a user provider. This defines how the
    | users are actually retrieved out of your database or other storage
    | mechanisms used by this application to persist your user's data.
    |
    | If you have multiple user tables or models you may configure multiple
    | sources which represent each model / table. These sources may then
    | be assigned to any extra authentication guards you have defined.
    |
    | Supported: "database", "eloquent"
    |
    */

    'providers' => [
        'users' => [
            'driver' => 'non',
            'model' => App\User::class,
        ],

        // 'users' => [
        //     'driver' => 'database',
        //     'table' => 'users',
        // ],
    ],

Laravel 5.3 使用自定义的哈希(Hash)函数来处理密码

为了兼容minecraft的authme密码hash方式,我们不能使用laravel自带的BcryptHash。所以我们需要对登录流程进行一些修改。

首先我们来看原来的BcryptHash是在哪里使用的

#vendor\laravel\framework\src\Illuminate\Auth\CreatesUserProviders.php

    /**
     * Create an instance of the Eloquent user provider.
     *
     * @param  array  $config
     * @return \Illuminate\Auth\EloquentUserProvider
     */
    protected function createEloquentProvider($config)
    {
        return new EloquentUserProvider($this->app['hash'], $config['model']);
    }

这里我们发现当创建默认的EloquentUserProvider时,laravel自带hash,也就是Bcrypt被作为参数传递了,所以我们就要想办法让这里不使用自带hash,而在这里直接更改是不行的,因为这是laravel的源码,我们是不能修改的。

我们转而把注意力放在自定义UserProvider上,自定义之后我们当然就能使用自己的hash方式了。下面是一个例子(http://laravelacademy.org/post/5974.html

#app\Providers\AuthServiceProvider.php

<?php

namespace App\Providers;

use Illuminate\Support\Facades\Auth;
use App\Extensions\RiakUserProvider;
use Illuminate\Support\ServiceProvider;

class AuthServiceProvider extends ServiceProvider
{
    /**
     * Register any application authentication / authorization services.
     *
     * @return void
     */
    public function boot()
    {
        $this->registerPolicies();

        Auth::provider('riak', function($app, array $config) {
            // Return an instance of Illuminate\Contracts\Auth\UserProvider...
            return new RiakUserProvider($app->make('riak.connection'));
        });
    }
}

但是这时候我们发现,其实我们完全还可以在这里继续使用EloquentUserProvider,因为我们的目的只是更改hash方式,只需要在上面实例化EloquentUserProvider的地方,将我们自己的Hash类作为第一个参数传递进去就好了。

首先,我们先写好我们自己的Hash类,根据EloquentUserProvider的源码,我们发现我们的Hash类必须是Illuminate\Contracts\Hashing\Hasher契约的实现,契约的源码如下

interface Hasher
{
    /**
     * Hash the given value.
     *
     * @param  string  $value
     * @param  array   $options
     * @return string
     */
    public function make($value, array $options = []);

    /**
     * Check the given plain value against a hash.
     *
     * @param  string  $value
     * @param  string  $hashedValue
     * @param  array   $options
     * @return bool
     */
    public function check($value, $hashedValue, array $options = []);

    /**
     * Check if the given hash has been hashed using the given options.
     *
     * @param  string  $hashedValue
     * @param  array   $options
     * @return bool
     */
    public function needsRehash($hashedValue, array $options = []);
}

我们只需要补全上面的方法,实现这个接口即可,下面是我们自定义的AuthmeHasher

namespace App\Libraries\Hashing;
use Illuminate\Contracts\Hashing\Hasher as HasherContract;

class AuthmeHasher implements HasherContract{

    /**
     * Hash the given value.
     *
     * @param  string  $value
     * @param  array   $options
     * @return string
     */
    public function make($value, array $options = []){
        $p1 = '$SHA';
        $p2 = str_random(16);
        $p3 = hash('sha256', hash('sha256', $value) . $p2);
        $hash = join('$',[$p1,$p2,$p3]);
        return $hash;
    }

    /**
     * Check the given plain value against a hash.
     *
     * @param  string  $value
     * @param  string  $hashedValue
     * @param  array   $options
     * @return bool
     */
    public function check($value, $hashedValue, array $options = []){
        if (strlen($hashedValue) === 0) {
            return false;
        }

        $parts = explode('$', $hashedValue);
        return count($parts) === 4
        && $parts[3] === hash('sha256', hash('sha256', $value) . $parts[2]);
    }

    /**
     * Check if the given hash has been hashed using the given options.
     *
     * @param  string  $hashedValue
     * @param  array   $options
     * @return bool
     */
    public function needsRehash($hashedValue, array $options = []){
        if (strlen($hashedValue) === 0) {
            return false;
        }
        return $hashedValue;
    }
}

这里由于不知道needsRehash方法该如何写,所以我直接返回了原先的hashedValue。具体这个文件的写法,我们也可以参考laravel默认的vendor\laravel\framework\src\Illuminate\Hashing\BcryptHasher.php

接下来就是最关键的部分了,我们将自己的AuthmeHash注入到EloquentUserProvider

#app\Providers\AuthServiceProvider.php

namespace App\Providers;

use Auth;
use Illuminate\Auth\EloquentUserProvider;
use App\Libraries\Hashing\AuthmeHasher;
use Illuminate\Support\Facades\Gate;
use Illuminate\Foundation\Support\Providers\AuthServiceProvider as ServiceProvider;

class AuthServiceProvider extends ServiceProvider
{
    /**
     * The policy mappings for the application.
     *
     * @var array
     */
    protected $policies = [
        'App\Model' => 'App\Policies\ModelPolicy',
    ];

    /**
     * Register any authentication / authorization services.
     *
     * @return void
     */
    public function boot()
    {
        $this->registerPolicies();

        //使用authme的Hash来处理密码
        Auth::provider('authme', function($app, array $config) {
            return new EloquentUserProvider(new AuthmeHasher,$config['model']);
        });
    }
}

当然,最后别忘了设置config\auth.php下面的providers中driver为你上面在Auth::provider中声明的名字

/*
    |--------------------------------------------------------------------------
    | User Providers
    |--------------------------------------------------------------------------
    |
    | All authentication drivers have a user provider. This defines how the
    | users are actually retrieved out of your database or other storage
    | mechanisms used by this application to persist your user's data.
    |
    | If you have multiple user tables or models you may configure multiple
    | sources which represent each model / table. These sources may then
    | be assigned to any extra authentication guards you have defined.
    |
    | Supported: "database", "eloquent"
    |
    */

    'providers' => [
        'users' => [
            'driver' => 'authme',
            'model' => App\User::class,
        ],

        // 'users' => [
        //     'driver' => 'database',
        //     'table' => 'users',
        // ],
    ],


在最后还是说一句,学习Laravel阅读源码还是关键,文档的作用有的时候比较有局限性。本篇文章参考了http://blueve.me/archives/898的一些信息

使用Homestead来部署Laravel 5.3

本文写于:2016年9月22日 13:25:29,如果时间久远部分细节可能存在变动,请访问相关网站获取最新信息

Laravel 致力于让整个 PHP 开发过程变得让人愉悦,包括本地开发环境,为此官方为我们提供了一整套本地开发环境 —— Laravel Homestead。

Laravel Homestead 是一个打包好各种 Laravel 开发所需要的工具及环境的 Vagrant 盒子(Vagrant 提供了一个便捷的方式来管理和设置虚拟机),该盒子为我们提供了优秀的开发环境,有了它,我们不再需要在本地环境安装 PHP、HHVM、Web服务器以及其它工具软件,我们也完全不用再担心误操作搞乱操作系统 —— 因为 Vagrant 盒子是一次性的,如果出现错误,可以在数分钟内销毁并重新创建该 Vagrant 盒子!

Homestead可以运行在 Windows、Mac 以及 Linux 系统上,其中已经安装好了Nginx、PHP7.0、MySQL、Postgres、Redis、Memcached、Node以及很多其它开发 Laravel 应用所需要的东西。

如果你使用的是Windows,需要开启系统的硬件虚拟化(VT-x),这通常可以通过BIOS来开启。

1. 安装VirtualBox

下载地址:https://www.virtualbox.org/wiki/Downloads

安装过程中一路下一步就可以了

2. 安装Vagrant和Laravel盒子

下载地址:https://www.vagrantup.com/downloads.html

安装过程没有什么特殊操作,别忘了在安装后重启操作系统

重启完成之后,可以通过下面的命令来查看安装是否成功

vagrant --version

然后我们使用下面的命令下载Laravel Homestead Vagrant盒子

vagrant box add laravel/homestead

这一步会花费很长时间,部分地区可能还会被,可以使用VPN或者把curl.exe加入你的代理来解决(比如使用Proxifier搭配SS)

3. 安装PHP

我们到:http://windows.php.net/download 下载对应的PHP版本,我使用的是php-7.0.10-nts-Win32-VC14-x64.zip

PHP高版本可能需要安装对应的VC库,这里给出下载链接

VC11:https://www.microsoft.com/zh-CN/download/details.aspx?id=30679

VC14:https://www.microsoft.com/zh-CN/download/details.aspx?id=48145

一般我们把X86和X64的全部安装

把下载下来的PHP解压到你想要的位置,比如D:\php,然后别忘了把这个路径添加到你的用户环境变量里。完成后,重开cmd窗口输入php -v 应该可以显示你安装的php版本

然后我们进入刚才的php安装目录,拷贝php.ini-development 重命名为php.ini ,然后打开编辑,用查找找到下面的行,将其前面的分号去掉,然后保存。

extension_dir = "ext"
extension=php_openssl.dll
extension=php_mbstring.dll

4. 安装nodejs

下载地址:https://nodejs.org/en/download/

找到对应的安装包下载安装就可以了,安装完成后可以在cmd中使用node -v 来检测是否安装成功。
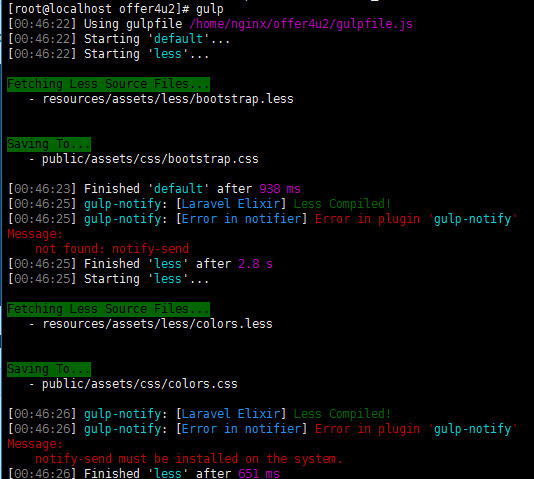
然后我们全局安装gulp

npm install -g gulp

5. 安装Composer

下载地址:https://getcomposer.org/download/

安装过程中如果php路径没有显示请检查你的环境变量,如果出现SSL没有启动的问题请检查你是否参照上文修改了php.ini中extension的配置。

安装完成后在cmd输入composer –version 来检查是否安装成功。

然后,我们把修改composer的源到composer中国镜像(http://pkg.phpcomposer.com/),加快速度。修改方式是打开cmd执行下面的命令

composer config -g repo.packagist composer https://packagist.phpcomposer.com

6. 安装Git

下载地址:https://git-scm.com/downloads

安装过程中请注意在下面的步骤中

d6ea26a1b609b7f56f09dfbcff58d3de

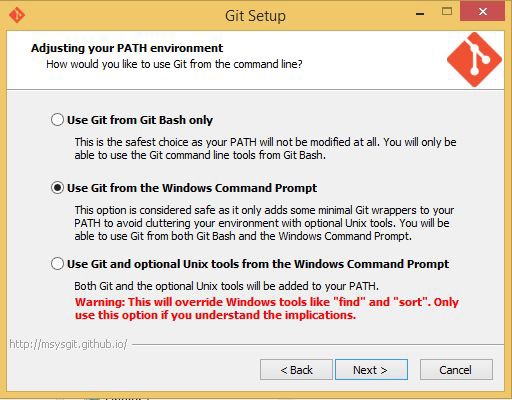
确保选择Use Git from the Windows Command Prompt选项,其他步骤下一步即可。

安装完成后在cmd输入git –version 来检查是否安装成功。

在 Windows 开始菜单找到 Git Bash 并运行,在打开的窗口中执行下面命令,一路回车使用默认选项即可,这将生成SSH Key。(别忘了修改你的email地址)

ssh-keygen -t rsa -C "[email protected]"

7. 安装laravel Install

打开cmd运行下面的命令

composer global require "laravel/installer"

8. 安装Laravel 5.3

打开你准备放置Laravel 5.3 RC1项目的文件夹,在当前文件夹运行cmd来安装laravel(可能需要科学上网)

laravel new demo

完成后,你的项目将被安装到demo文件夹下。我们使用cd demo 来进入demo目录

接着,我们安装所有的依赖

npm install

注意:从这一步开始我们后面的cmd运行目录均为demo文件夹下

9. 安装homestead

在cmd中运行下面指令安装homestead,我这里采用的是项目局部安装

composer require laravel/homestead --dev

执行完后,执行下面命令生成Homestead.yaml

vendor\bin\homestead make

生成之后的内容大概如下

---
ip: "192.168.10.10"
memory: 2048
cpus: 1
hostname: demo
name: demo
provider: virtualbox

authorize: ~/.ssh/id_rsa.pub

keys:
    - ~/.ssh/id_rsa

folders:
    - map: "C:/Users/XXX/PhpstormProjects/demo"
      to: "/home/vagrant/demo"

sites:
    - map: homestead.app
      to: "/home/vagrant/demo/public"

databases:
    - homestead

# blackfire:
#     - id: foo
#       token: bar
#       client-id: foo
#       client-token: bar

# ports:
#     - send: 50000
#       to: 5000
#     - send: 7777
#       to: 777
#       protocol: udp

在这个文件中,我们的虚拟机IP是192.168.10.10。

10. 启动Vagrant,所有步骤完成

我们在cmd运行vagrant up 来启动虚拟机,这一步骤的首次运行可能时间较长。

启动过程中可以观察到端口转发,我们本地的127.0.0.1的8000端口被转发到了192.168.10.10的80端口。

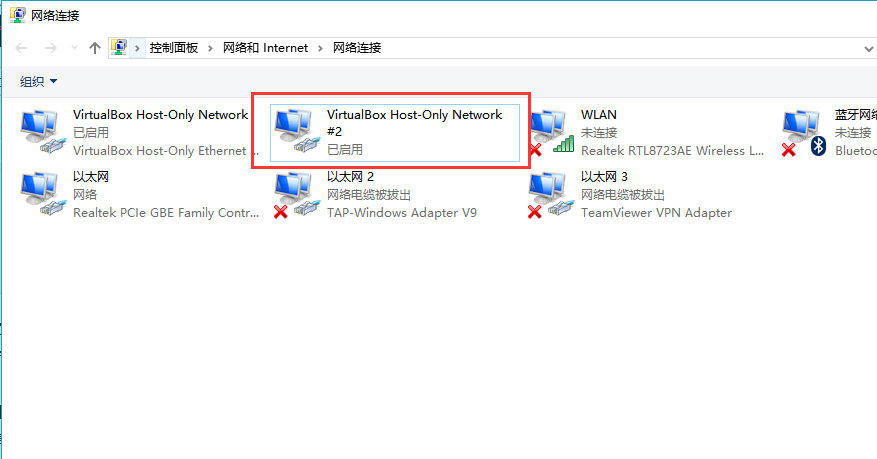
启动完成后我们ping一下192.168.10.10,如果不通的话请打开“控制面板\网络和 Internet\网络和共享中心”,就是适配器管理这个页面,找到最新添加的VM Box Host Only Network。如何判断最新呢,就是根据最后面#后面的数字。这里面是#2这个
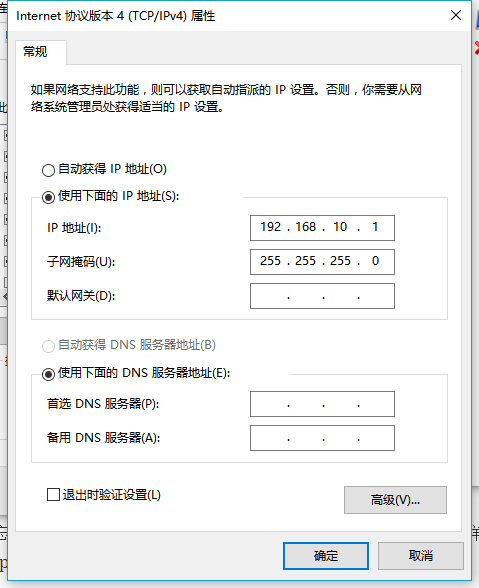
qq%e6%88%aa%e5%9b%be20160922142455

右键进入IPV4设置,修改如下

qq%e6%88%aa%e5%9b%be20160922142719

确认之后再ping,ping通后我建议你再运行一下vagrant halt 和vagrant up ,重启虚拟机。

最后别忘了在hosts文件中添加下面的内容,把域名指向虚拟机IP,这样以后我们就可以通过http://homestead.app 来访问我们的项目了

192.168.10.10	homestead.app

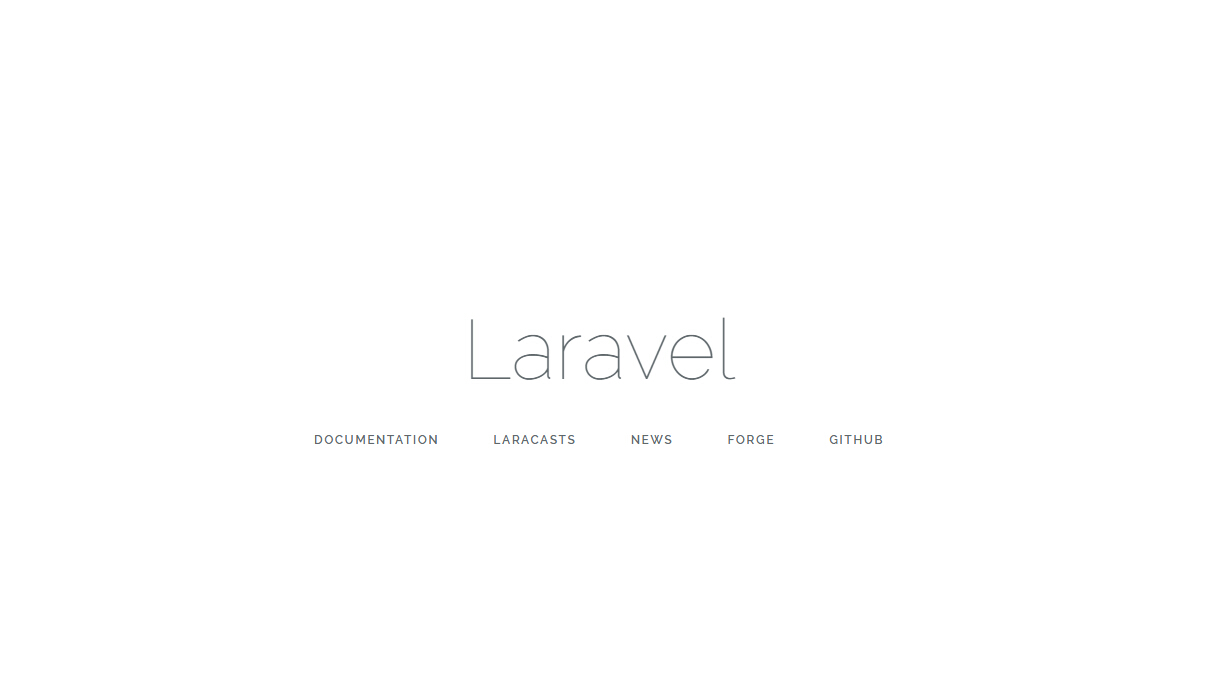
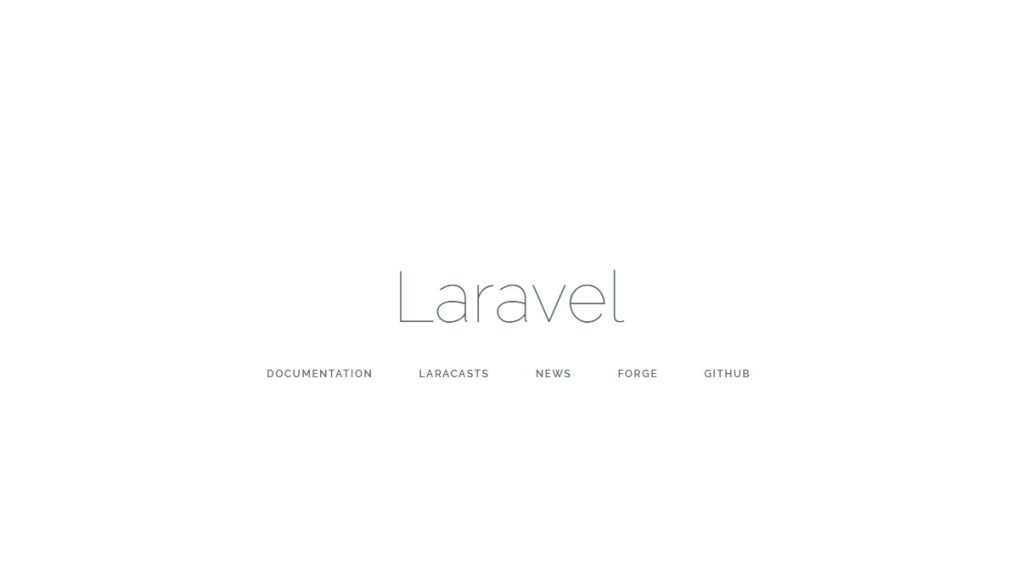
运行完后,我们打开http://homestead.app/ 就可以看到我们的laravel了

QQ截图20160822160513

注意:即使关闭当前cmd窗口虚拟机也不会关闭,想关闭虚拟机请打开cmd运行vagrant halt

一步一步学Laravel,安装gulp使用Laravel Elixir编辑前端资源

1. 如果没有安装nodejs,先安装nodejs和npm

访问https://nodejs.org/en/download/,下载你需要的包进行安装

Linux用户可以使用下面命令,/usr/local/node-4.4.0是我想安装的位置,可以换成你自己的

wget https://nodejs.org/dist/v4.4.0/node-v4.4.0-linux-x64.tar.xz
xz -d node-v4.4.0-linux-x64.tar.xz
tar -xvf node-v4.4.0-linux-x64.tar
mv node-v4.4.0-linux-x64 /usr/local/node-4.4.0

修改/etc/profile,为node配置环境变量

PATH=$PATH:/usr/local/node-4.4.0/bin
export PATH

然后执行下面命令使得更改生效

source /etc/profile

然后我们执行下面命令,显示版本号就代表nodejs安装成功

node -v

2. 回到我们的项目目录,进行使用Laravel Elixir的准备工作

安装全局gulp

npm install --global gulp

然后我们需要在项目目录再安装一次gulp,不执行这步会提示Local gulp not found

npm install gulp

然后安装Laravel Elixir

npm install

最后,Elixir 基于 Gulp,所以要运行 Elixir 命令你只需要在Shell中运行 gulp 命令即可。添加 –production 标识到命令将会最小化 CSS 和 JavaScript 文件

// Run all tasks...
gulp

// Run all tasks and minify all CSS and JavaScript...
gulp --production

3. 使用gulpfile.js

打开Laravel根目录的gulpfile.js文件,我们可以通过这个文件来为gulp配置任务

elixir(function(mix) {
    var output = 'public/assets/css';
    mix.less('bootstrap.less',output);
    mix.less('colors.less',output);
    mix.less('components.less',output);
    mix.less('core.less',output);
});

比如,上面的代码表示我们要把/resources/assets/less(LESS的默认目录)下面的bootstrap.less等这几个文件(如下图)使用less编译输出到public/assets/css目录

QQ截图20160316002851

然后我们在Shell里运行gulp即可开始任务,并能看到成功或错误的提示

gulp

QQ截图20160316003141

更多请参考 http://laravelacademy.org/post/3137.html