安装要求:
1. 系统要是Red Hat及其派生版本(比如我使用的CentOS),Debian和Ubuntu可能也可以安装不过需要一些其他配置

2. Oracle XE的版本要求SWAP分区是内存的2倍,如果你的SWAP空间不够可以参考下面这篇文章
https://onlyke.com/html/270.html
3. Tmpfs要求至少为2G,如果小于2G,将在安装中出现“Database Configuration failed. Look into /u01/app/oracle/product/11.2.0/xe/config/log for details“这样的错误。
Tmpfs修改步骤:
1)修改/etc/fstab文件
vi /etc/fstab
将(如果没有这句,请直接把改为的那句添加到末尾即可):
tmpfs /dev/shm tmpfs defaults 0 0
改为:
tmpfs /dev/shm tmpfs defaults,size=2048M 0 0
2)重新加载tmpfs
umount /dev/shm
mount /dev/shm
3)检查
df -h /dev/shm
看看Size是不是2G
安装步骤:
1. 安装依赖包
yum install libaio libaio-devel bc
2. 安装Oracle XE
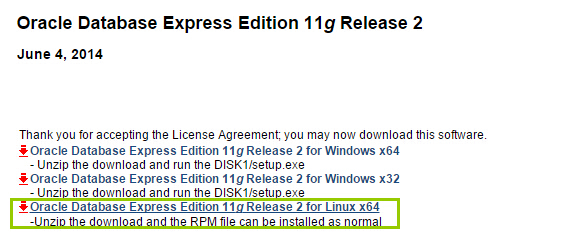
到下面这个网站下载Linux for 64
http://www.oracle.com/technetwork/database/database-technologies/express-edition/downloads/index.html
当然,你也可以wget
然后unzip这个压缩文件,没有unzip的记得执行
yum install zip unzip
然后,注意下面的文件名可能有变动,记得自己补全
cd Disk1
rpm -ivh oracle-xe-11.2.0-1.0.x86_64.rpm
安装成功会提示你输入下面的命令进入配置
/etc/init.d/oracle-xe configure
进入配置后
Specify the HTTP port that will be used for Oracle Application Express [8080]:
这是设置HTTP端口,回车可以默认
Specify a port that will be used for the database listener [1521]:
设置数据库端口,回车可以默认
Specify a password to be used for database accounts. Note that the same
password will be used for SYS and SYSTEM. Oracle recommends the use of
different passwords for each database account. This can be done after
initial configuration:
这里输入数据库sys用户的密码,注意不能为空。
Do you want Oracle Database 11g Express Edition to be started on boot (y/n) [y]:
这里问你是否要开机启动数据库(可能并没有开机启动,可能还有地方要设置),输入y即可。
然后会显示下面的文字
Starting Oracle Net Listener…Done
Configuring database…Done
Starting Oracle Database 11g Express Edition instance…Done
Installation completed successfully.
到这里Oracle数据库已经安装完成了,安装完成后,会自动建立一个名为oracle的用户,用户目录/u01/app/oracle。
会建立dba组,oracle用户属于这个组。
会自动生成一个数据库实例,名为XE。/u01/app/oracle/product/11.2.0/xe/dbs/spfileXE.ora
3. 设置oracle的环境变量
vi /etc/profile
加入:
export ORACLE_BASE=/u01/app/oracle
export ORACLE_HOME=/u01/app/oracle/product/11.2.0/xe
export PATH=$PATH:$ORACLE_HOME/bin
export ORACLE_SID=XE
接着我们logout注销用户然后重新登录,就可以使用sqlplus登录了
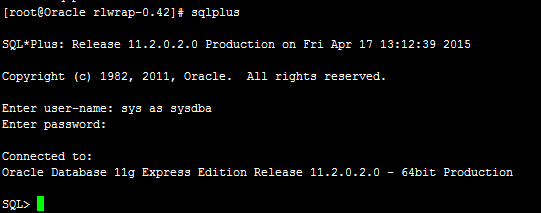
sqlplus /nolog
Enter user-name: sys as sysdba
Enter password: 输入你刚才的密码
登陆成功!显示下面的信息
Connected to:
Oracle Database 11g Express Edition Release 11.2.0.2.0 – 64bit Production
别着急,在Linux下使用sqlplus,默认情况下我们是无法使用退格键,上下键进行文字删除,语句历史记录的使用的。为了解决这个问题,我们需要安装readline和rlwrap。
解决功能键乱码的问题:
1. 安装依赖包
yum install readline-devel
2. 下载rlwrap,下面的网站
http://utopia.knoware.nl/~hlub/uck/rlwrap/
然后使用
tar -zxvf xxx.tar.gz
解压缩,进入到解压之后的目录里
3. 安装rlwrap
./configure
make
make install
这样以后登陆数据库的时候,可以使用下面的指令避免乱码
rlwrap sqlplus / as sysdba
如果每次都需要输入 rlwrap 感觉麻烦的话 , 还可以加入到 .bash_profile 中, 就不用每次都输入了
vi ~/.bash_profile
添加
alias sqlplus='rlwrap sqlplus'
alias rman='rlwrap rman'
保存退出
使文件立即生效
source ~/.bash_profile