分类目录归档:前端

解决vue-echarts的dataZoom在更新后丢失已选位置的问题 | How to solve dataZoom of vue-echarts loses the selected position after updating options

vue-echarts在启用了dataZoom后如果options被更新,dataZoom的start和from会被重置。解决这个问题可以采用下面的方法。

假设你之前是这么配置组件的

<e-charts
  :options="options"
  v-if="options"
  class="chart"
  autoresize
></e-charts>

首先,在组件上监听dataZoom事件

<e-charts
  :options="options"
  class="chart"
  @datazoom="dataZoom"
  autoresize
></e-charts>

在data中添加zoomStart和zoomEnd

dataZoom(action) {
  if (
    "batch" in action &&
    Array.isArray(action.batch) &&
    action.batch.length > 0
  ) {
    this.zoomStart = action.batch[0].start;
    this.zoomEnd = action.batch[0].end;
  } else if ("start" in action && "end" in action) {
    this.zoomStart = action.start;
    this.zoomEnd = action.end;
  }
}

dataZoom事件有两种触发方式,第一个if分支将在使用滚轮时触发,第二个分支将在拖动手柄时触发。

在data中添加realOptions。然后,在watch下面监听options的变化,将zoomStart和zoomEnd重新赋值。

options(newValue) {
  if (newValue) {
    for (let i = 0; i < newValue.dataZoom.length; i++) {
      newValue.dataZoom[i].start = this.zoomStart;
      newValue.dataZoom[i].end = this.zoomEnd;
    }
    this.realOptions = newValue;
  }
}

最后,修改组件的属性

<e-charts
  :options="realOptions"
  v-if="realOptions"
  class="chart"
  @datazoom="dataZoom"
  autoresize
></e-charts>


If the options are updated after dataZoom has enabled in vue-echarts, the start and from of dataZoom will be reset. The following methods can be used to solve this problem.

Suppose your component looks like this

<e-charts
  :options="options"
  v-if="options"
  class="chart"
  autoresize
></e-charts>

First, listen to the dataZoom event on the component

<e-charts
  :options="options"
  class="chart"
  @datazoom="dataZoom"
  autoresize
></e-charts>

Create zoomStart and zoomEnd fields to data.

dataZoom(action) {
  if (
    "batch" in action &&
    Array.isArray(action.batch) &&
    action.batch.length > 0
  ) {
    this.zoomStart = action.batch[0].start;
    this.zoomEnd = action.batch[0].end;
  } else if ("start" in action && "end" in action) {
    this.zoomStart = action.start;
    this.zoomEnd = action.end;
  }
}

There are two ways to trigger the dataZoom event. The first if branch will be triggered when the scroll wheel is used, and the second branch will be triggered when the handle is dragged.

Create a realOptions field to data. Then, watch the changes of options and assign zoomStart and zoomEnd.

options(newValue) {
  if (newValue) {
    for (let i = 0; i < newValue.dataZoom.length; i++) {
      newValue.dataZoom[i].start = this.zoomStart;
      newValue.dataZoom[i].end = this.zoomEnd;
    }
    this.realOptions = newValue;
  }
}

Finally, modify the properties of your component

<e-charts
  :options="realOptions"
  v-if="realOptions"
  class="chart"
  @datazoom="dataZoom"
  autoresize
></e-charts>


解决Handsontable在minSpareRows, stretchH和rowHeaders开启的情况时,自动添加的新行宽度和列头宽度不一致导致表格错位的问题

Handsontable的初始化代码如下

// Define element
    var hot_populate = document.getElementById('hot_populate')

    // Initialize with options
    var hot_populate_init = new Handsontable(hot_populate, {
        data: hot_populate_data,
        startRows: 8,
        startCols: 5,
        minSpareRows: 1,
        colHeaders: true,
        rowHeaders: true,
        stretchH: 'all',
        contextMenu: true,
    });

这时,如果我们编辑表格自动生成的最后一行,就会发现只要输入的文本长度比较短,整个表格会因为当前列的宽度问题而发生错位。

经过各种搜索,我也没有发现什么好的解决方案,只能采用了一种每次在创建新行后刷新表格绘制的方法。而且实现的过程也比较绕远,不过问题最终还是解决了。如果有更好的办法,欢迎大家分享给我。

首先,打开handsontable.min.js,在文件开头加入

var mydansunFixNewColWidth = new Event('mydansunFixNewColWidth');

然后,往下查找instance.draw()

你会找到下面这行代码

n.addEventListener(window,"resize",function(){"none"!==t.instance.getSetting("stretchH")&&t.instance.draw()}),

然后把下面这行代码添加到上面那行代码的后面(注意上面那行代码最后有个逗号)

n.addEventListener(window,"mydansunFixNewColWidth",function(){"none"!==t.instance.getSetting("stretchH")&&t.instance.draw()}),

最后,我们修改之前Handsontable的初始化代码如下

// Define element
    var hot_populate = document.getElementById('hot_populate')

    // Initialize with options
    var hot_populate_init = new Handsontable(hot_populate, {
        data: hot_populate_data,
        startRows: 8,
        startCols: 5,
        minSpareRows: 1,
        colHeaders: true,
        rowHeaders: true,
        stretchH: 'all',
        contextMenu: true,
        afterCreateRow:function(index,amount){
            var instance = hot_populate_init;
            if(instance !== undefined){
                window.dispatchEvent(mydansunFixNewColWidth);
            }
            
        },
    });

再返回我们的页面,刷新。现在添加的新行已经可以拥有正确的宽度了,错位的问题也得到了解决。

用js解决bootstrap的列col在重新在新的一行排列时,会受到上一行列col高度影响的问题

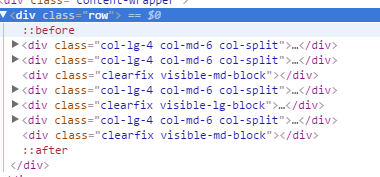
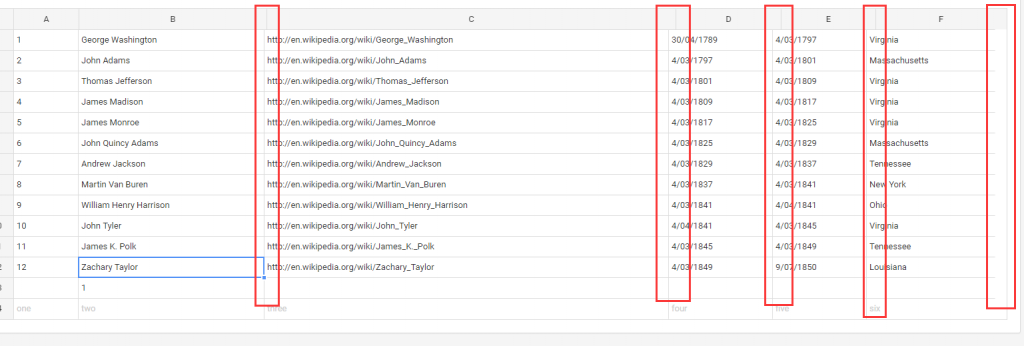
我们经常遇到这种情况,当我们在一行(row)中放置多个列(col)的时候,新起一行的列因为上面一行有一列超高,位置发生了移动。

bootstrap官方的解决方法是在每一行的末尾,插入下面的div用来清除浮动

http://v3.bootcss.com/css/#grid-responsive-resets

<div class="clearfix visible-xs-block"></div>

其中,visible-xs-block 是可以改变的,改变成你每个列用的栅格种类,比如你所有的栅格用的是col-lg-4 (如上图),你就需要改成visible-xs-block

但是这样,我们需要对每一行都做处理,这不适合下面两种情况

  1. 如果每一列是由程序(比如PHP)自动生成的,没办法手动添加
  2. 每一列用了多种栅格,比如col-md-6 col-lg-4 ,手动很麻烦

下面我编写了一个js来快速解决这个问题,首先我们把所有需要处理的栅格都加上col-split 的class,然后把下面的js代码放在合适的位置让他能够执行即可。

$(".col-split").each(function(index, el) {
        var $this = $(this);
        var $parent = $this.parent('.row');
        if($parent.data("colSplit") === true){
            return;
        }
        $parent.data("colSplit",true);
        var classes = $this.attr("class");
        var exp = new RegExp(/col-([a-zA-Z]{2})-(\d+)/,"g");
        var result;
        while ((result = exp.exec(classes)) != null){
            var visible = "visible-" + result[1] + "-block";
            var width = parseInt(12 / parseInt(result[2]));
            $parent.children('.col-split').each(function(index, el) {
                var $item = $(this);
                var number = index + 1;
                if(number % width == 0){
                    $item.after('<div class="clearfix ' + visible + '">');
                }
            });
        }
    });

添加代码完成后,刷新页面,我们想要的样子就出现了。

上面的js代码支持使用多种栅格的列,比如col-md-6 col-lg-4 ,他会在合适的位置自动插入,效果如图

google-font字体缓存,将谷歌字体保存在本地,方便网页使用,避免被墙

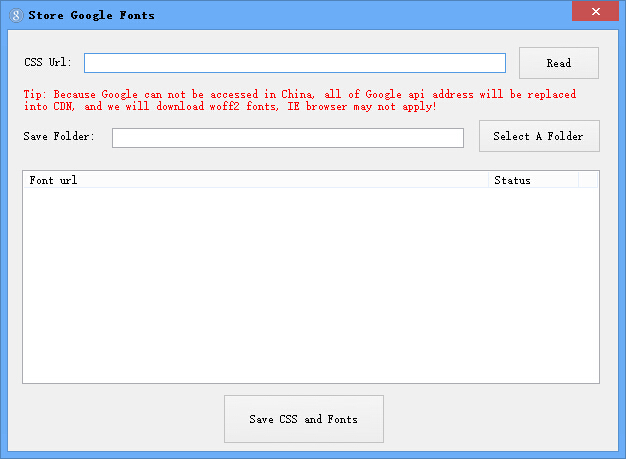
自己写的小程序,可以将fonts.googleapis.com的字体缓存在本地,不需要使用CDN,也不用担心被墙了

尤其是国内的CDN,fonts.useso.com这个网站不支持https,比如我的博客就把字体缓存了

QQ截图20160309233138

使用方法:

  1. 把google-fonts的字体放在CSS Url里面,比如:https://fonts.googleapis.com/css?family=Roboto|Open+Sans:400italic|Lato:300italic
  2. 然后点击Select A Folder选择保存的目录
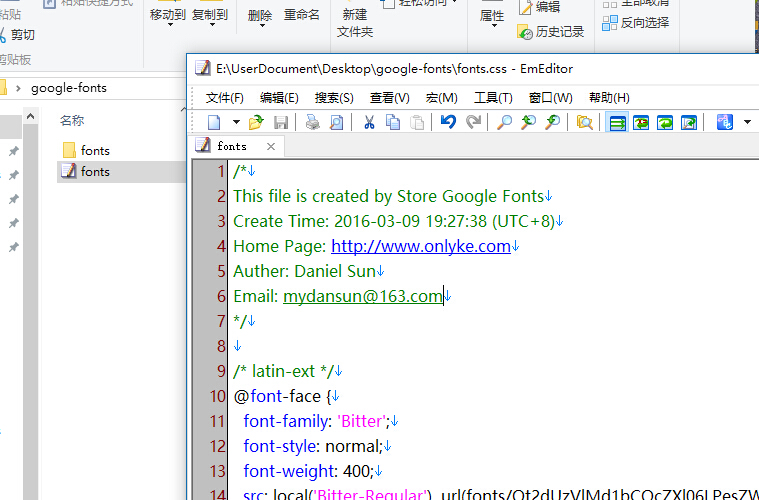
  3. 在保存目录找到缓存好的字体和css文件,在HTML中引用即可,css文件内容如图
    QQ截图20160309233904

网盘链接: http://pan.baidu.com/s/1o7wI0K6 密码: csk5

Sublime3 安装SublimeLinter PHP+Javascipt+CSS 帮助检测语法错误

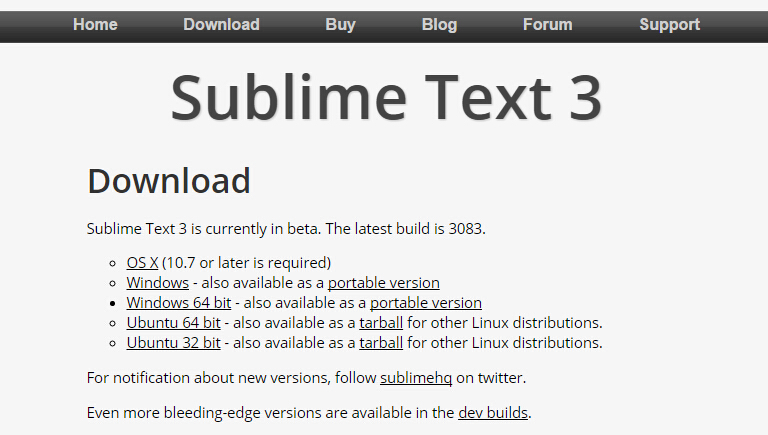
前段时间把自己的Sublime2更新到了3,发现原先的SublimeLinter配置文件不起作用了。目前国内给出相应答案的网站比较少,现在给出对于Sublime3的解决方案。

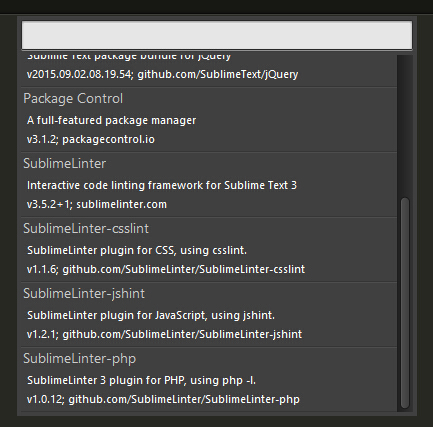
在Sublime3中,SublimeLinter的检测插件被独立了出来,也就是说我们除了SublimeLinter本体以外,我们还需要安装Sublimelinter-phpSublimelinter-jshintSublimelinter-csslint这三个插件。

QQ截图20150918184608

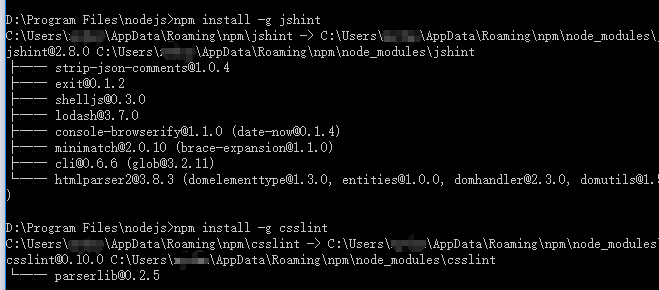
然后需要用nodejs安装jshint和csslint,使用如下命令。(没有安装nodejs请先安装nodejs)

npm install -g jshint
npm install -g csslint

安装完成后如下图所示

QQ截图20150918182832

可以使用如下命令检查这两个插件是否安装完成

npm install -g jshint
csslint --version

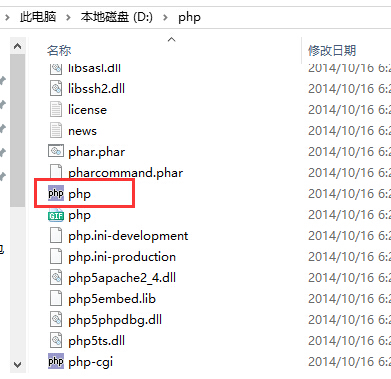
除了nodejs以外,我们还需要php程序包,没有的可以到http://php.net/downloads.php这里下载,这里我放到了D盘根目录

QQ截图20150918185414

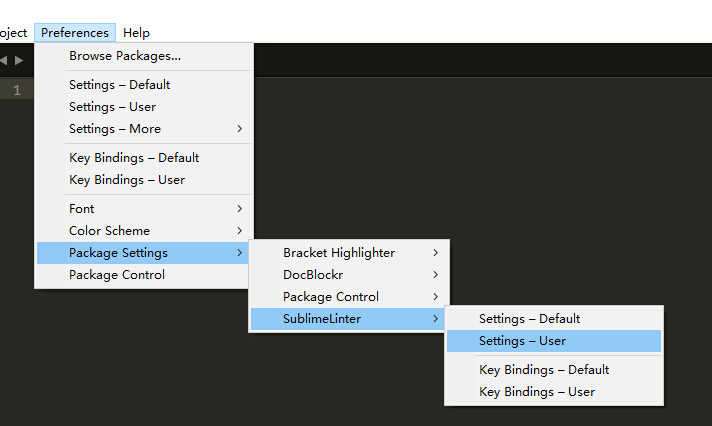
接下来打开SublimeLinter的设置,如下图

QQ截图20150918184709

我们配置文件修改如下

{
    "user": {
        "debug": false,
        "delay": 0.25,
        "error_color": "D02000",
        "gutter_theme": "Packages/SublimeLinter/gutter-themes/Default/Default.gutter-theme",
        "gutter_theme_excludes": [],
        "lint_mode": "background",
        "linters": {
            "csslint": {
                "@disable": false,
                "args": [],
                "errors": "",
                "excludes": [],
                "ignore": "",
                "warnings": ""
            },
            "jshint": {
                "@disable": false,
                "args": [],
                "excludes": []
            },
            "php": {
                "@disable": false,
                "args": [],
                "excludes": []
            }
        },
        "mark_style": "outline",
        "no_column_highlights_line": false,
        "passive_warnings": false,
        "paths": {
            "linux": [],
            "osx": [],
            "windows": [
                "D:\\php"
            ]
        },
        "python_paths": {
            "linux": [],
            "osx": [],
            "windows": []
        },
        "rc_search_limit": 3,
        "shell_timeout": 10,
        "show_errors_on_save": true,
        "show_marks_in_minimap": true,
        "syntax_map": {
            "html (django)": "html",
            "html (rails)": "html",
            "html 5": "html",
            "javascript (babel)": "javascript",
            "php": "html",
            "python django": "python"
        },
        "warning_color": "DDB700",
        "wrap_find": true
    }
}

其中paths项,需要把PHP的路径放进去,show_errors_on_save可以控制是否在保存的时候提示错误,这里我选择了打开

然后重启sublime,就可以执行代码检查了

在初始化select2之后无法使用data属性动态改变数据的解决方法

这几天写的项目,发现在初始化select2之后无法使用data属性动态改变数据,如果使用以下的代码

var client_address = $("#client-address-select");
client_address.select2({
    data:return_data.address
});

Chrome提示: Option ‘data’ is not allowed for Select2 when attached to a <select> element

解决方法如下:

var client_address = $("#client-address-select");
client_address.select2("destroy");
client_address.html("");
$.each(return_data.address,function(){
    client_address.append('');
});

polymer小例子,在nwjs中实现数字统计小应用

node-webkit的定义,按照作者的说法:

“ 基于node.js和chromium的应用程序实时运行环境,可运行通过HTML(5)、CSS(3)、Javascript来编写的本地应用程序。node.js和webkit的结合体,webkit提供DOM操作,node.js提供本地化操作;且将二者的context完全整合,可在HTML代码中直接使用node.js的API。”

按照我的理解,我们可以在nwjs中开发基于web技术的应用,也就是用HTML+CSS+JS来开发桌面应用程序,而nwjs为我们提供了一个webkit的框架,其中结合nodejs的api让功能更加丰富。

而最近笔者也在学习polymer,谷歌的一个非常强悍的项目。polymer 是一个google开发的web components方式的前端UI控件库,它实现了google最新发布的Material design 设计规范。polymer的概念很超前,polymer中有很多可以借鉴学习的地方。 

QQ截图20150518204534

polymer官方网站: http://www.polymer-project.org/(可能需要翻墙)

此外这里有一篇文章笔者觉得很有用处,http://www.topthink.com/topic/2673.html

源码github地址:https://github.com/mydansun/polymer-example-nwjs

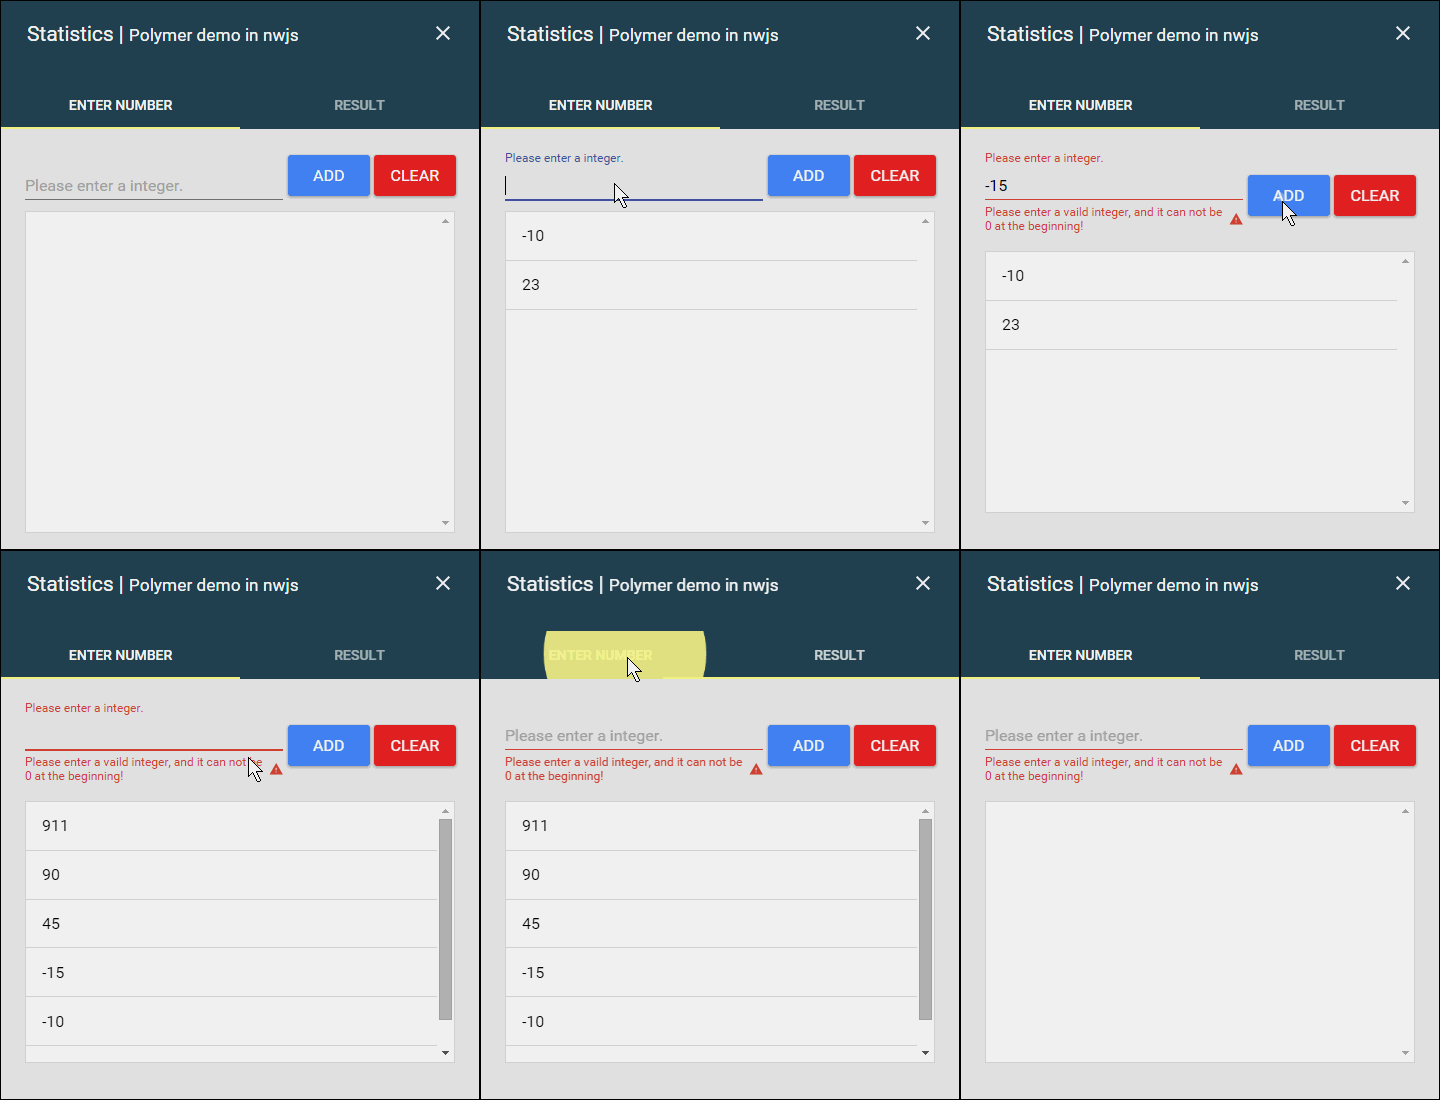
这个应用的截图如下,背景是我家女神!

QQ截图20150518204449


还有一个gif的动图


new2